How to Format Windows 7? 5 amazing and useful steps
Sooner or later, in the life of a computer, it happens to have to resort to formatting , both to eliminate a bad virus that is compromising its proper functioning, either because it has become too slow, or because maybe you just want to give a nice clean up general and start from the factory conditions of your pc.
Whatever the reason for the decision to format, we are often held back in carrying out an operation of this type because we consider it too complex and delicate to be performed by a person who is not exactly expert. Keep reading: VIDEO CALL WHATSAPP: NEVER TRIED TO MAKE ONE?
How to Format Windows 7?

With this article, I want to help you in trying to format Windows 7 step by step, but before you start something important: did you remember to save everything you have on your computer? NO?! I’ll help you, take a look at my post on the pre-formatting backup, so you’ll be sure not to lose important data.
Step 1: Know the processor before formatting Windows 7

First, before formatting Windows 7 you need to know what the architecture of our processor is, if it supports the 32-bit or 64-bit version of the operating system, since a 32-bit processor (also referred to as x86) can only support operating systems 32-bit, while one 64 (indicated with x64) can support both the 32-bit version and the 64-bit version, quietly.
The difference between the two processors consists of more performance during the execution of programs with high energy absorption, such as editing software or 3D, which with a processor and 64-bit operating system can run faster.
To know the version of the operating system currently in use on Windows 7, just click the “Start” button, move to “Computer” and click with the right mouse button in an empty spot in the window. At this point click on “Properties” and scrolling under “System” just take a look at “System Type” to find out immediately if it is a 32 bit or 64 bit.
Instead, to know the architecture of the processor just download and install CPU-Z , a small program that will indicate the model of processor installed on the PC. After installation, open the program and from the CPU board look for the Instructions item: if EM64T appears in the abbreviation, then you have a processor that supports the 64-bit version.
Step 2: Operating system DVD and BIOS setting to format Windows 7

After checking this important detail, we are almost ready to format Windows 7: we need to get the DVD containing the Microsoft operating system and check the BIOS settings.
This additional step is necessary to tell the computer to start the DVD inserted in the player first and then the hard disk, otherwise despite the DVD inserted, the computer will start normally preventing us from formatting Windows 7.
So, turn on the PC and wait for the home screen of your motherboard: check the writing that tells you the key to access the settings or directly to the BIOS (usually by pressing the “Delete” or the F10 or F12 keys) and once in BIOS moved with the keyboard arrows on the Boot tab and then select Boot Device Priority .
From here, playing with the arrows, make sure to place the DVD player in the first position. In this way, you will order the PC to start the DVD inserted inside it first. After that, press F10 to save the configuration and exit, and click “Enter” to “OK”.
Upon reboot, you will be presented with a black screen with the words:
Press any key to boot from a CD-ROM or DVD-ROM …
Press a key at your pleasure from the keyboard and here we are going to the heart of the operation to format Windows 7.
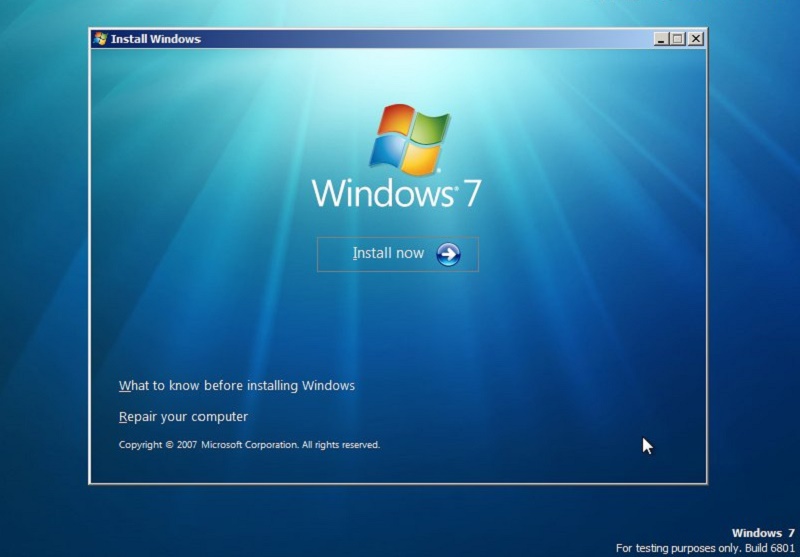
After the upload indicated with “Windows is loading files …”, we will be facing the Windows 7 installation screen that will ask us to set the language, the time and currency format and the keyboard layout or input method: we leave “Italian “On everything and click on” Next “and then on” Install “.
If you have a DVD containing various versions of Windows 7, you will find yourself in front of a screen that will allow you to choose between the various versions of the operating system to format Windows 7, with the Starter , Home Basic, Home Premium or Professional versions.
It is here that we will need to know the architecture of our processor, as we explained above, to make the right choice between x86 or x64.
Are you still there? Well, let’s move on: there’s still a way to format Windows7!
Step 3: The steps to format Windows 7

Continue by accepting the license terms by ticking and clicking on “Next”, then choose the type of installation to be performed by clicking on “Personalized (expert users)”.
Do not worry, there is nothing transcendental to know, and only by doing so can you definitively format Windows 7 by cleaning up the system and starting from scratch with a virgin operating system.
We then continue by selecting the desired partition where to install Windows 7, and click on “Options” below and then on “Format”.
Note: if there are multiple entries, ie when the hard disk has more partitions, you can choose to delete the superfluous by clicking on it and selecting “Delete” instead of “Format”. In doing so, the space of the same will be added to the “Unallocated Space”, making it wider, and you can continue to format Windows 7.
You’ve finally managed to format or delete and clean up, your hard drive without much difficulty. It does not seem true yet, it’s that easy, eh? Believe me, more to say than done, but now you have your hard drive nice, clean and … empty! And you need Windows, right? We then install the operating system from scratch.
Step 4: After the operations to format Windows 7 proceed with the installation

Now you will have to select the partition on which to install Windows 7 and click on the “Next” button: the actual installation of the OS will start and you will have to wait a few minutes for the computer to perform all the necessary operations. You will be able to follow the progress of the process by following all the steps taken until the computer is restarted.
When you start again, you will be back in front of the text Press any key to boot from CD-ROM or DVD-ROM … DO NOT do it! You would re-enter the formatting screen, and you do not need to waste time unnecessarily, so stay away from the keyboard and wait patiently for the end of the installation of the operating system.
And at the next screen that will ask you to press a button to start from DVD remember not to touch anything, otherwise, your PC will explode and you will not be able to format Windows 7. Yes, ok, I’m kidding.
Step 5: Preparing to start Windows 7

First “Start”, we are almost ready to enjoy the PC clean and fast after formatting, missing only some other details, such as entering the username (who is the PC? You can use the name of the owner or one of fantasy, as long as you remember) and entering a password or not.
A password could be particularly useful if you have too many suitors to your computer: setting it, you can protect your data because every time you start the password will be required before you can use the PC.
We are almost there, we get to one of the most important points to format Windows 7, namely the activation of Windows 7 by entering the product key, which is none other than the serial number you received with the purchase of the license ( why did you buy the operating system, right? Do not answer, nod, head over, could spy on us).
If unfortunately, you did not have the serial code on hand at the time of installation, you can uncheck the Activate Windows automatically as soon as an internet connection is available and click on “Next”.
At this point in the formatting of Windows 7, we must take care of the PC. Click on “Use recommended settings” and proceed by checking the set time zone and time on the next screen.
Protect your computer when formatting windows 7

One more click on “Next” and here we are to decide the network settings through the current location of the computer, choosing between
- Home Network
- Company network
- Public Network
The choice of the network varies depending on the situation in which you are, easy no?
One last “Avanti” and … Tadaaaaaaaaan! Completed the preparation of the first boot here we are finally welcomed by the new Windows 7 desktop! We managed to format Windows 7!
Come on, do not make it that long, it’s not so complicated to format Windows 7, right?
Finally, you have learned to format Windows 7 as it should and without too much trouble. At least, the next time you find yourself in difficulty, you’ll already know how to proceed (perhaps keeping this post saved in the “Favorites” to review some points that you do not remember precisely), and without having to go back to breaking the boxes to the guy on duty that is always busy and has little time to fix the pc!
If you like my guide to format Windows 7, if you have any doubts or problems during the process, you can leave a comment right below! You might also like: http://yellowtube.org/6-ways-to-protect-your-website-from-cyber-attacks/

